calypso showhome by pacesetter homes

Feature Showhome: The Calypso by Pacesetter Homes

This week’s feature showhome is the Calypso by Pacesetter Homes. The overall design concept for this home is Modern California Coastal with traditional influences and natural elements. Read on as we unpack the style of home, the design concept and a touch on a few key products used throughout the home.

Check out our Instagram page to view the full review on this showhome! 

All About the Calypso
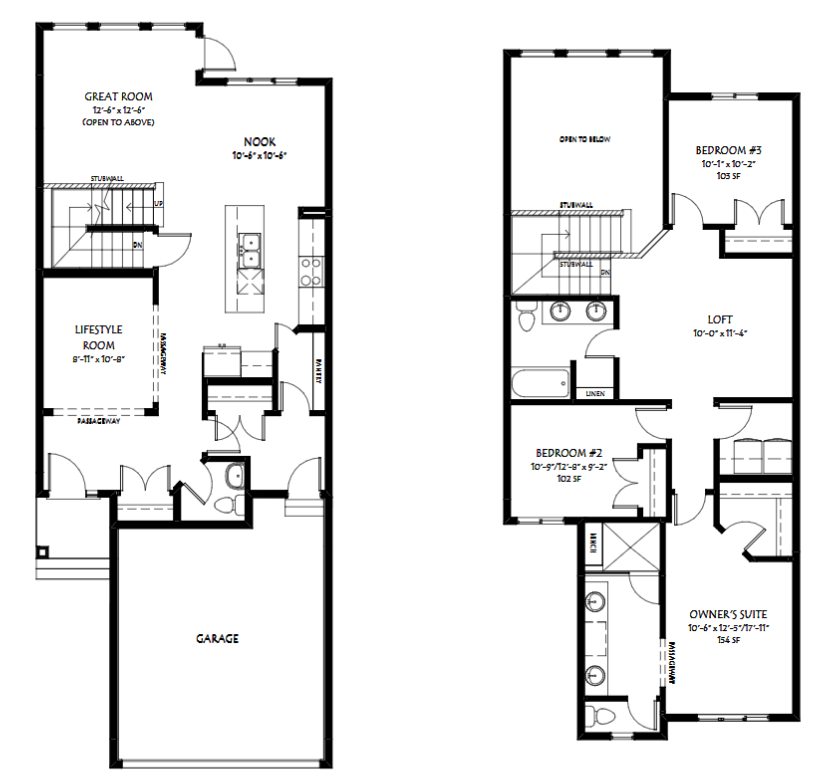
Size: 1911 sqft
Type: Single Family Detached Home
Garage Size: Double Attached 
Main Floor Perks: Separate lifestyle room, walk-through pantry and open to above great room.

Upper Floor Features: Primary bedroom has a walk in closet and beautiful ensuite. There are 2 additional bedrooms, a loft and laundry room upstairs as well
Bonus! There are many optional layouts to choose from with this model, including a separate entrance to the basement!

The Design Concept

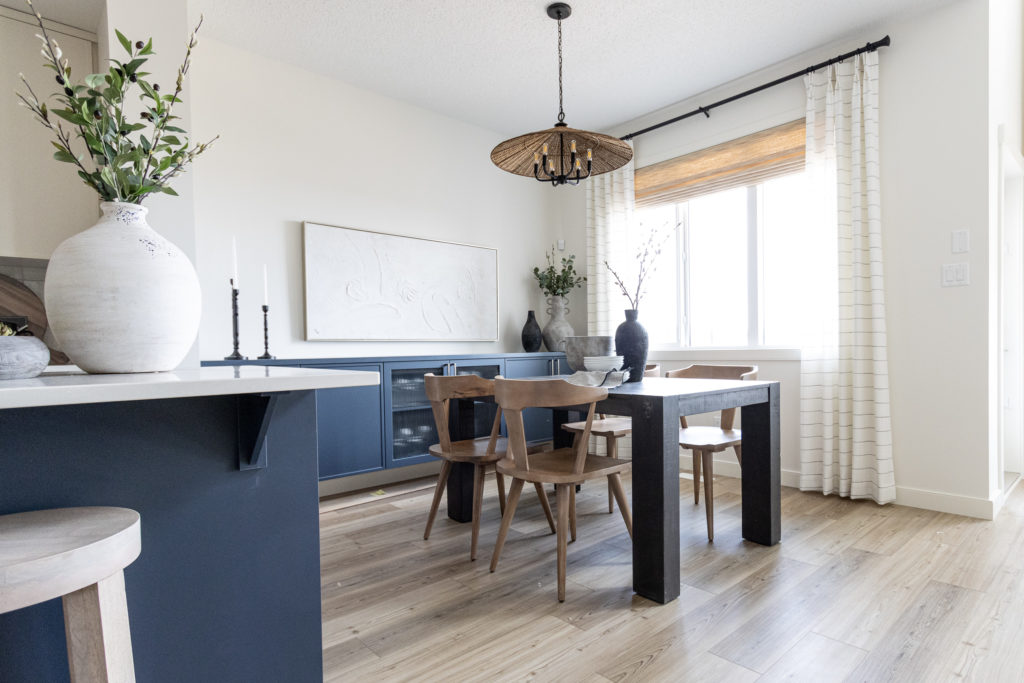
The inspiration behind this home was a balance of contemporary and traditional elements. Clean, neutral colors help to create an airy and open feel, while the navy blue cabinets bring forth a coastal vibe while still remaining calm and relaxed.

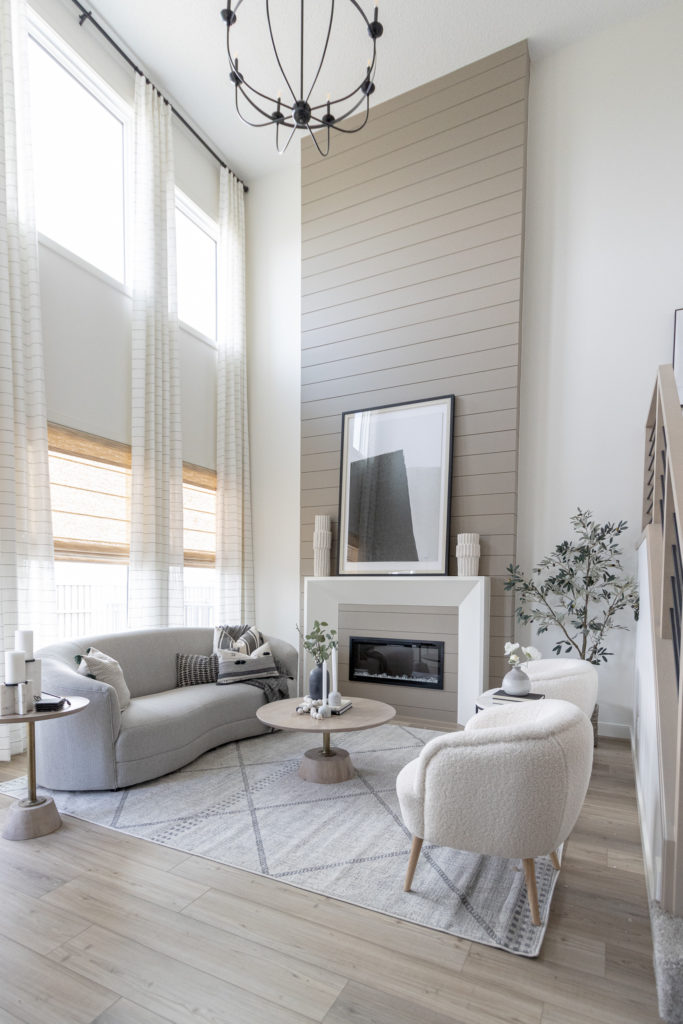
One way to achieve this same look in your home is to utilize curved furniture and boucle fabrics for the contemporary aspects of this design. Then, bringing in elements such as navy & cream and a shiplap feature wall will help to tie in the Modern Coastal vibe. 
calypso showhome by pacesetter homes

Get the Look: The Kitchen

calypso showhome by pacesetter homes

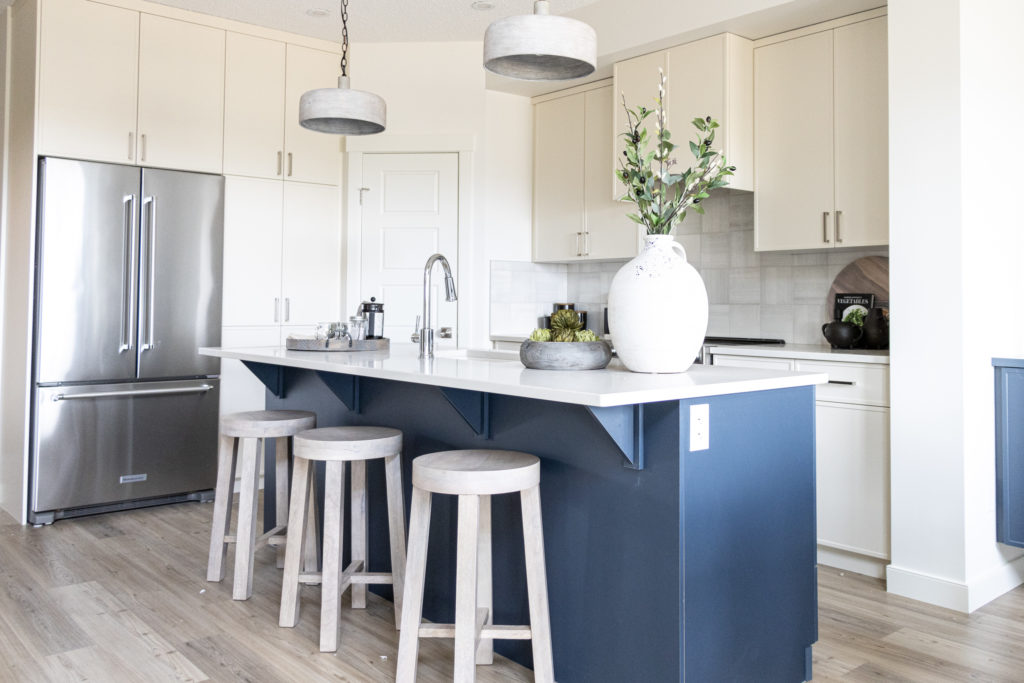
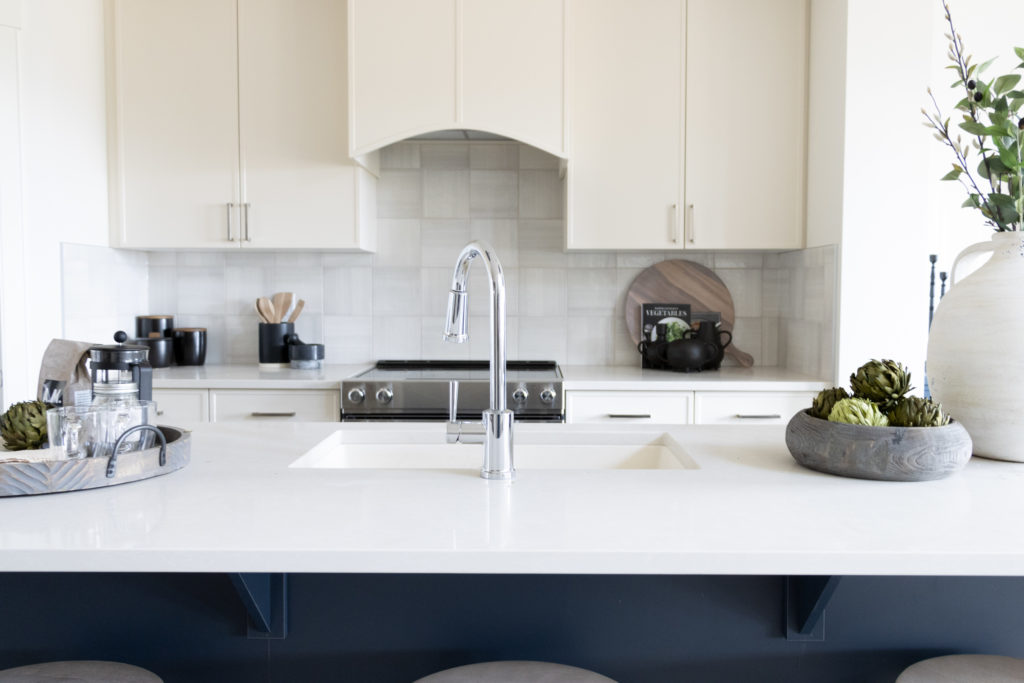
The kitchen in this showhome is STUNNING. True to the contemporary style, our designers chose a sleek and clean cabinet profile showcased in the Crème color for the perimeter and Midnight Blue for the island. 

As far as the cabinet layout goes a few modifications were made as well. The first was to convert the cabinets beside the fridge into a tall pantry. This allows for so much more storage space and fills in the kitchen nicely. Secondly, a custom wood hood was designed to bring in the coastal mood. Then the island was extended into the nook to accommodate a built in microwave! Finish the look off with a stunning hand glazed backsplash tile

Get the Look: The Lifestyle Room

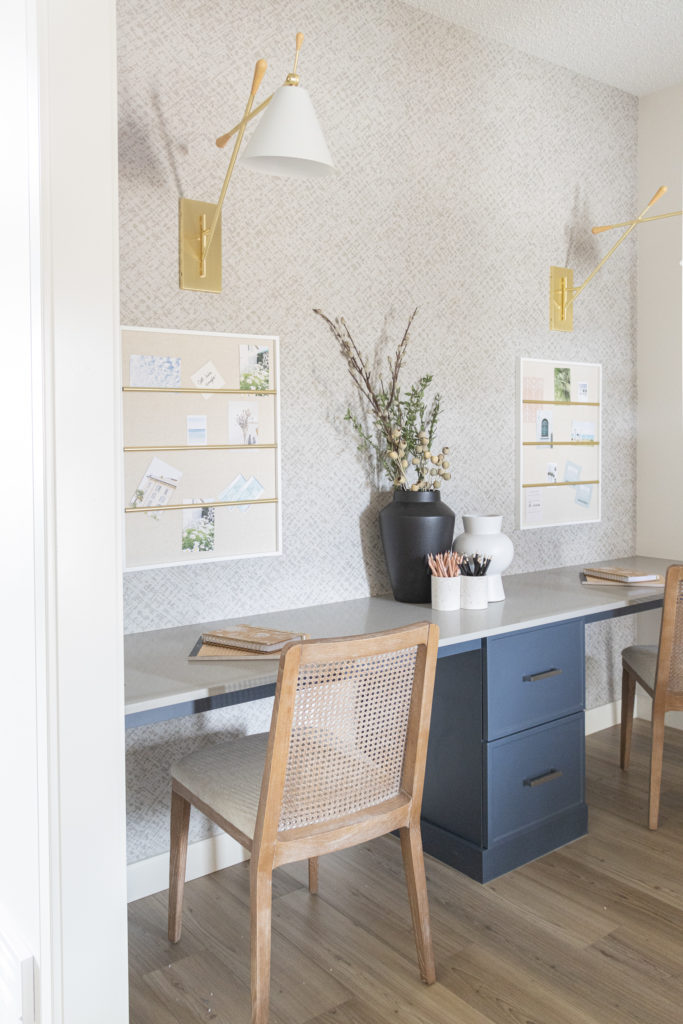
In this showhome our designers staged the main floor lifestyle room as a homework space. By adding a built in desk to match the kitchen cabinetry, our designers were able to continue the modern coastal theme into this room. You don’t need to add a built in desk though – you can always get a few freestanding ones and still achieve the same look.  
 
Then add an interesting wallpaper, a comfortable chair and a few sconces and your kids will be begging to do their homework.

Get the Look: The Great Room

calypso showhome by pacesetter homes

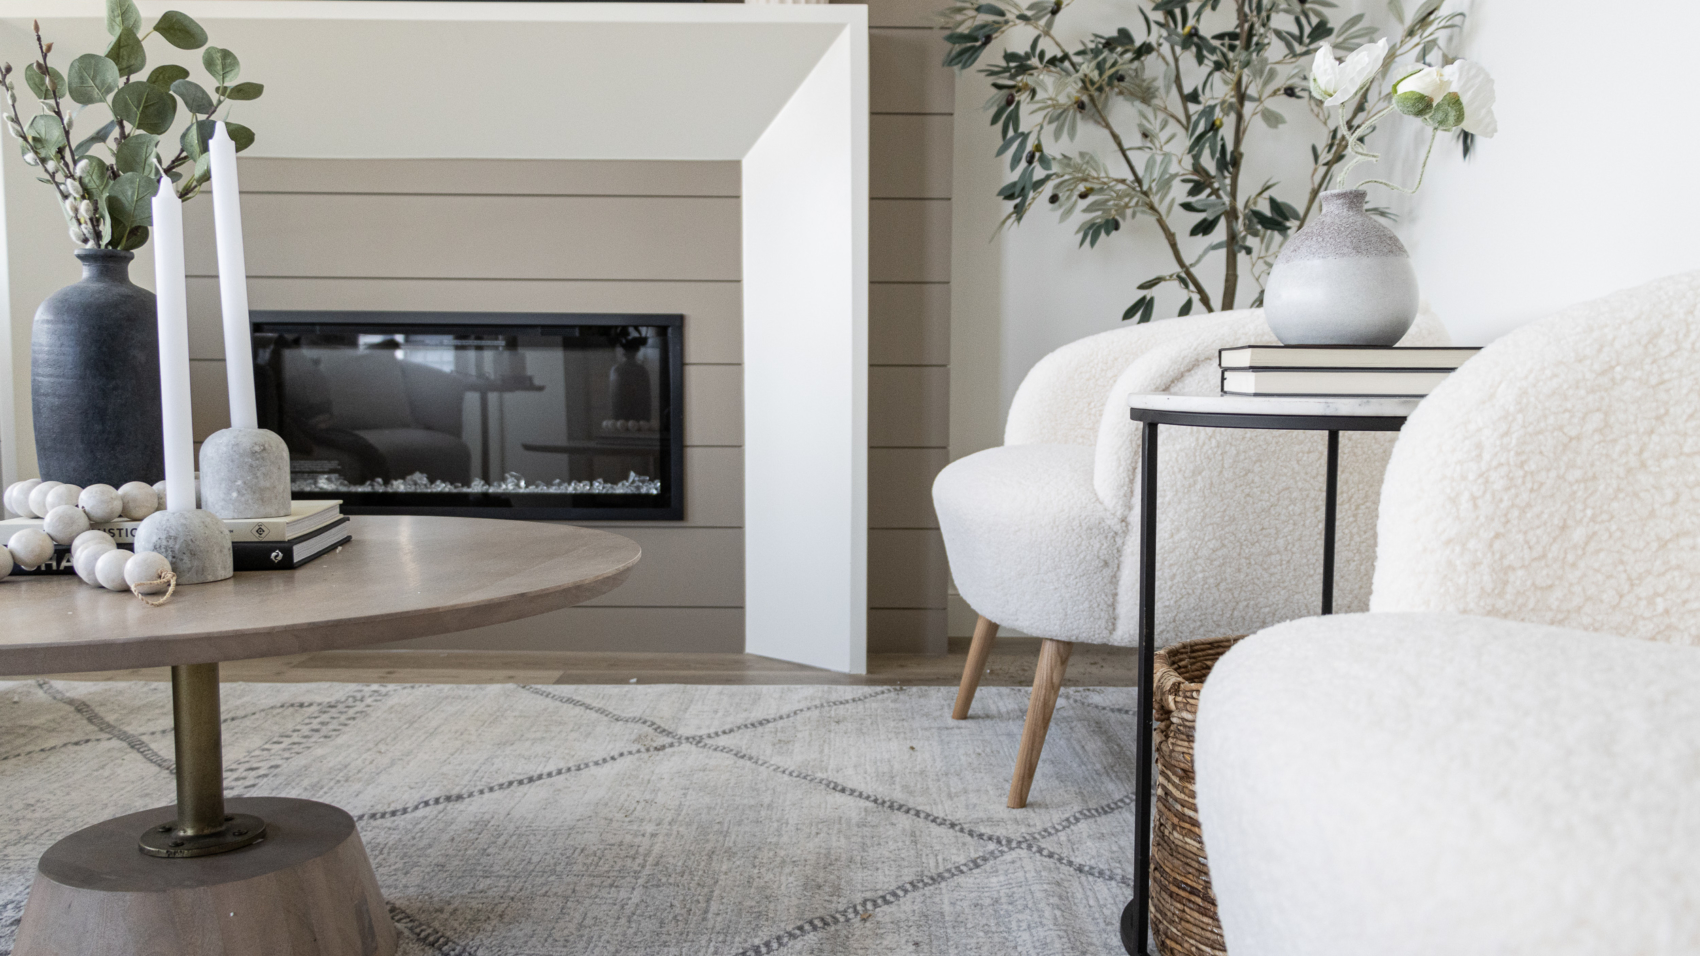
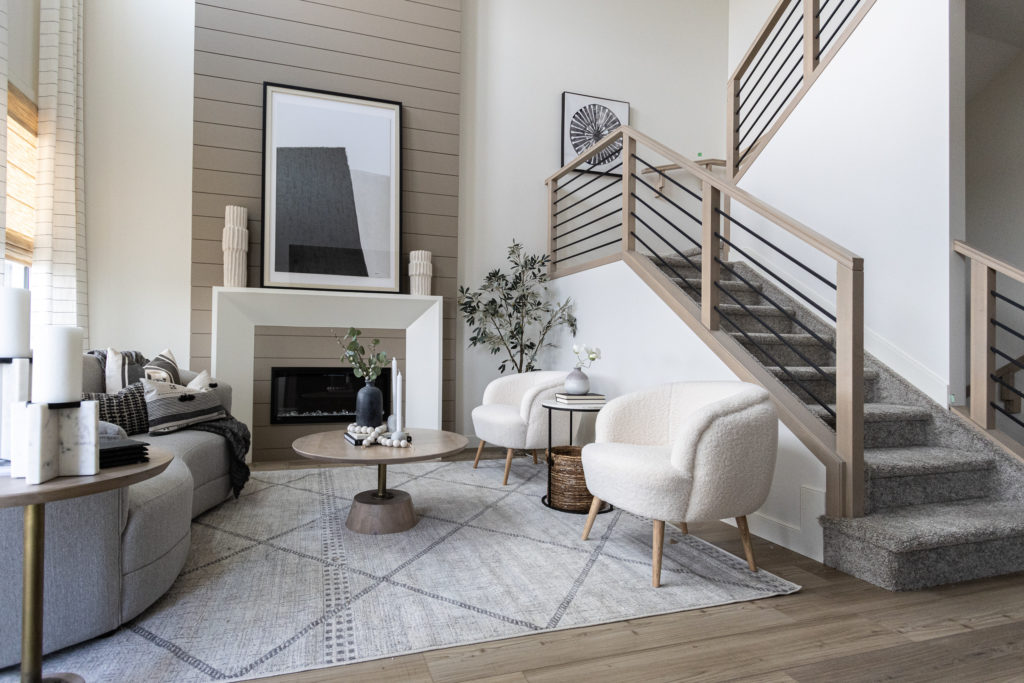
With this home having an open to above living room space, it was easy to add in a knockout fireplace feature. Our designers decided to add in shiplap alllllll the way to the ceiling, and by painting it a taupe color it turns it from farmhouse to modern. Put a classic, contemporary mantle on top and voila! – a show stopping fireplace wall. 

We would be remiss if we didn’t mention the railing in this home. One of the newer products available at designQ, we put in this stunning horizontal railing all the way to the 2nd floor. The handrail is stained to match the flooring, and the black spindles add just the right amount of contrast. 
Get the Look: The Ensuite

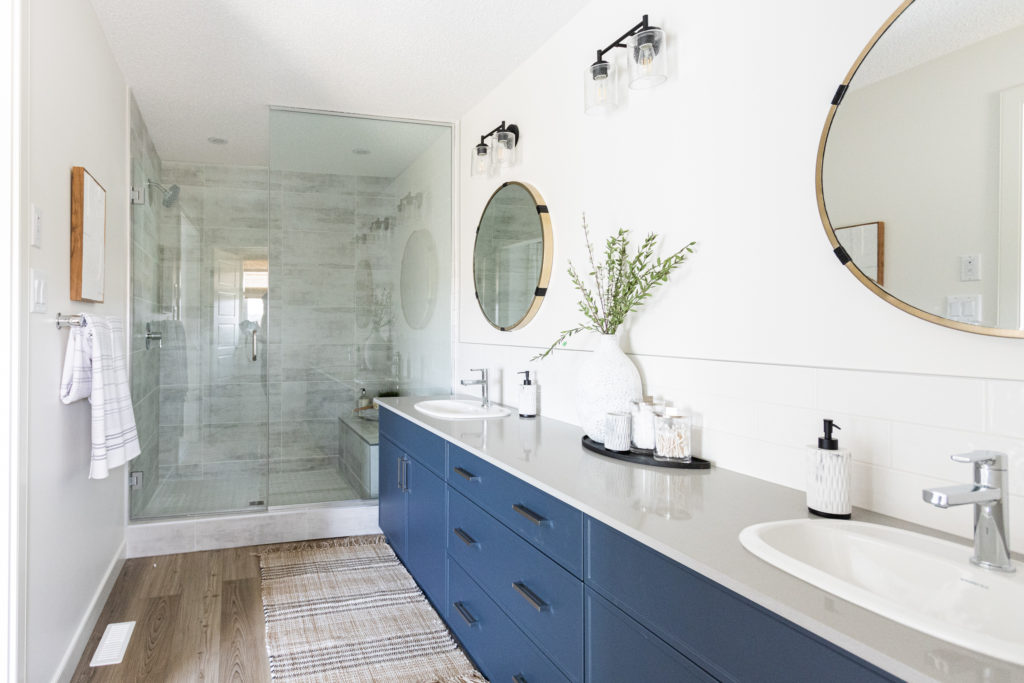
If you love going to the spa but hate leaving your house, then this is the ensuite is for you. We continued with the Midnight Blue cabinetry, and paired it with a crisp white brick backsplash tile that is carried all the way into the shower. By adding in gold framed mirrors and concrete-look countertops this ensuite is truly a coastal dream. 
15

All About the designQ Allowance

If you are purchasing a home with Pacesetter Homes, Sterling Homes or StreetSide Developments, you may have the option to visit their design center, designQ. Did you know you can add an allowance to your contract to spend on interior selection products with us? Watch below as we explain everything you need to know about the designQ Allowance.

What is a designQ Allowance?

A designQ allowance is basically a gift certificate to designQ. It allows you to add money into your mortgage to spend on upgrades at either your interior selections or retail appointment. 

When does a designQ Allowance get added to the contract?

The designQ allowance will be added by the area sales manager when writing up your contract. This allows it to be included in your mortgage. 

Can a designQ Allowance get added after the contract is signed?

We recommend you add the allowance to the initial contract with your area sales manager.

How do you determine how much of an allowance will be needed?

Start by browsing our website to get an idea of what products you are interested in. Then, while writing the contract with your area sales manager they will work with you to estimate a price that will cover the cost.

Why is it an allowance, and not an exact price?

As every home is unique there are many different variables to take into consideration such as layout changes, different specifications and different products. At your interior selections appointment we will provide you with exact pricing. 

What types of products can be included in a designQ Allowance?

Anything that is attached to your home, like flooring, cabinets, paint, window coverings and floor coverings. Basically if you took your house, flipped it upside down and shook it anything that didn’t fall out we can add. 

Can a designQ Allowance be added to a completed home?

Yes! Although the products you can include will be limited to items such as blinds, drapery and wall features. 

How does the designQ Allowance get used at the appointment?

Although you do create a wishlist with you area sales manager, it is not final. Our designers will use that as a reference during your interior selections appointment, however you can spend the allowance on whichever upgrades you would like. 

What are some key products to account for in a designQ allowance?

It’s a good idea to have a designQ allowance if you are interested in higher value items such as cabinet upgrades, cabinet layout changes, interior railing or tile

How will you know if you used the full allowance amount?

At the beginning of your interior selections appointment we will start with a credit of your allowance, and we will add upgrades towards it. Throughout the day your interior designer will keep you updated of where you are at and when you are approaching your total.

What happens if not all of the allowance is used?

No problem. Any unused portion of your allowance will simply be applied to your closing statement as a credit. This can help to offset any other charges that have come up during your building, unless it’s within 45 days of your possession. 

Why 45 Days?

45 days prior to your possession, the builder finalizes your closing statement to send to the lawyer. This typically cannot be changed. 

What happens if more than the allowance is spent?

Once again, not a problem. Any additional charges at designQ will simply be added to your closing statement to be paid at the lawyers. 

Can any overages be added to a mortgage?

Yes this is a possibility, however here at designQ we are not privy to your mortgage details so we recommend you speak with your mortgage specialist first.

Can products be purchased directly through designQ?

No, unless you are purchasing products through our designQ Shop such as blinds, drapery, wall features or furniture

All information listed in this post and video are deemed to be accurate at the time of filming. The information provided is a general overview of how a designQ allowance is used and may be differ in unique situations.  If you have any questions or concerns, please speak to your area sales manager with your builder. 

blueprint main

Reading Blueprints for Beginners

You may hear or read this phrase a lot when you are building a new home “Locations As Per Plan”. But, if you are a newbie to reading a job plan it may be difficult to figure out exactly where those ‘locations’ are. 

When you come to designQ for your interior selections appointment, it’s important to know a few of the more common “as per plan” notations on your blueprints, so you can be prepared for your appointment. 

Flooring Locations

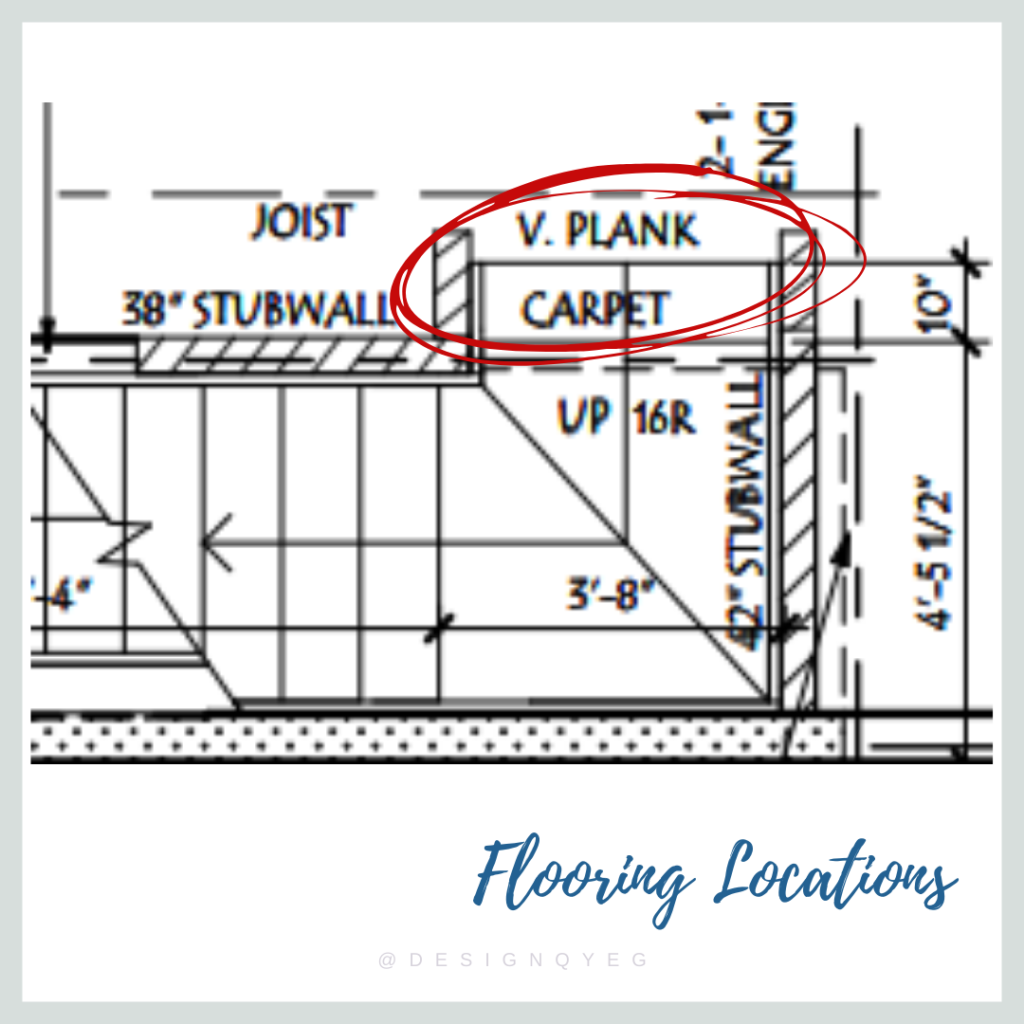
One of the largest selections you will make at designQ is what flooring will be in your home. If you are sticking with the included flooring options as per the Builder, then you will want to know which areas include what. 

The best place to see what is included is in the threshold of a room, or at the top or bottom of a stairwell. There will typically be a line separating the rooms, with a type of flooring on either side of that line. This will tell you what flooring is in what location. If there is no line in between rooms, then the flooring is continuous from the rest of the space (ie: great room to the half bath)

See below for some examples.

Railing or Stubwall?

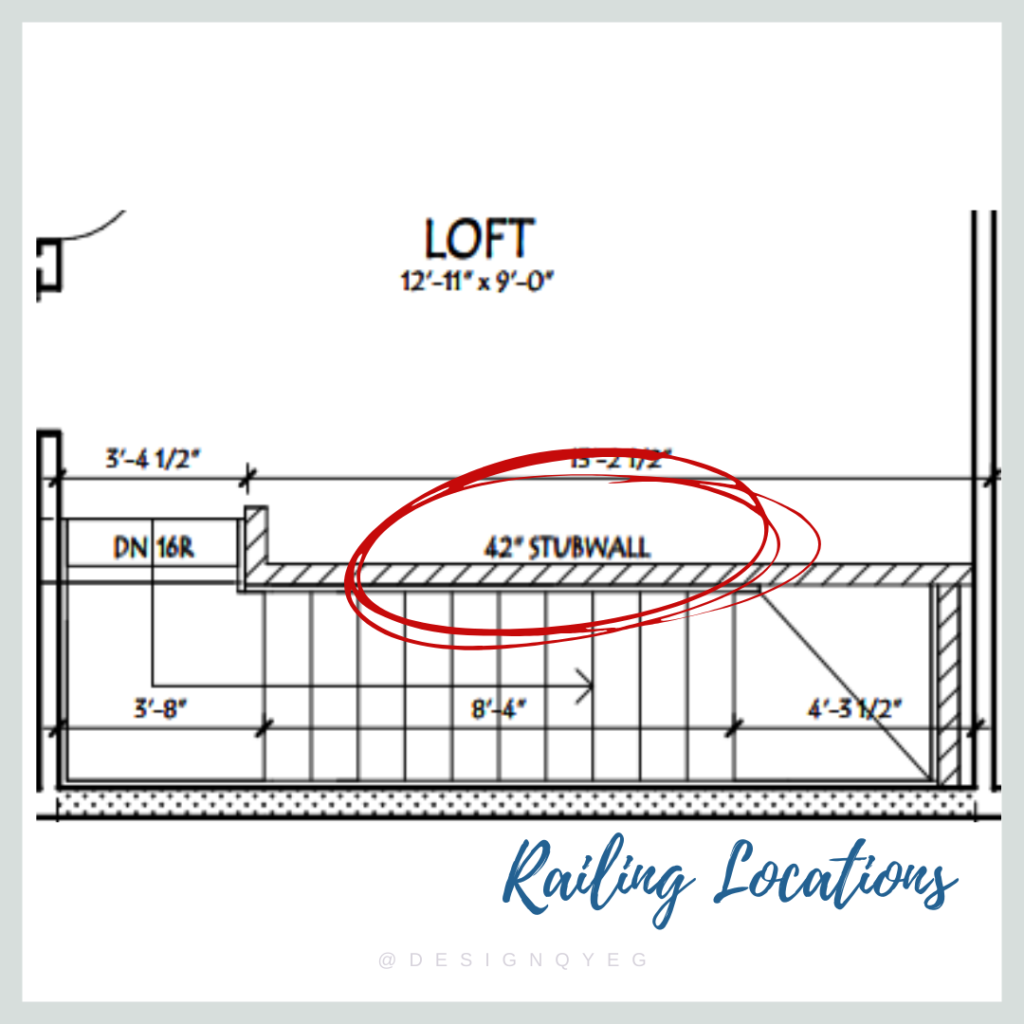
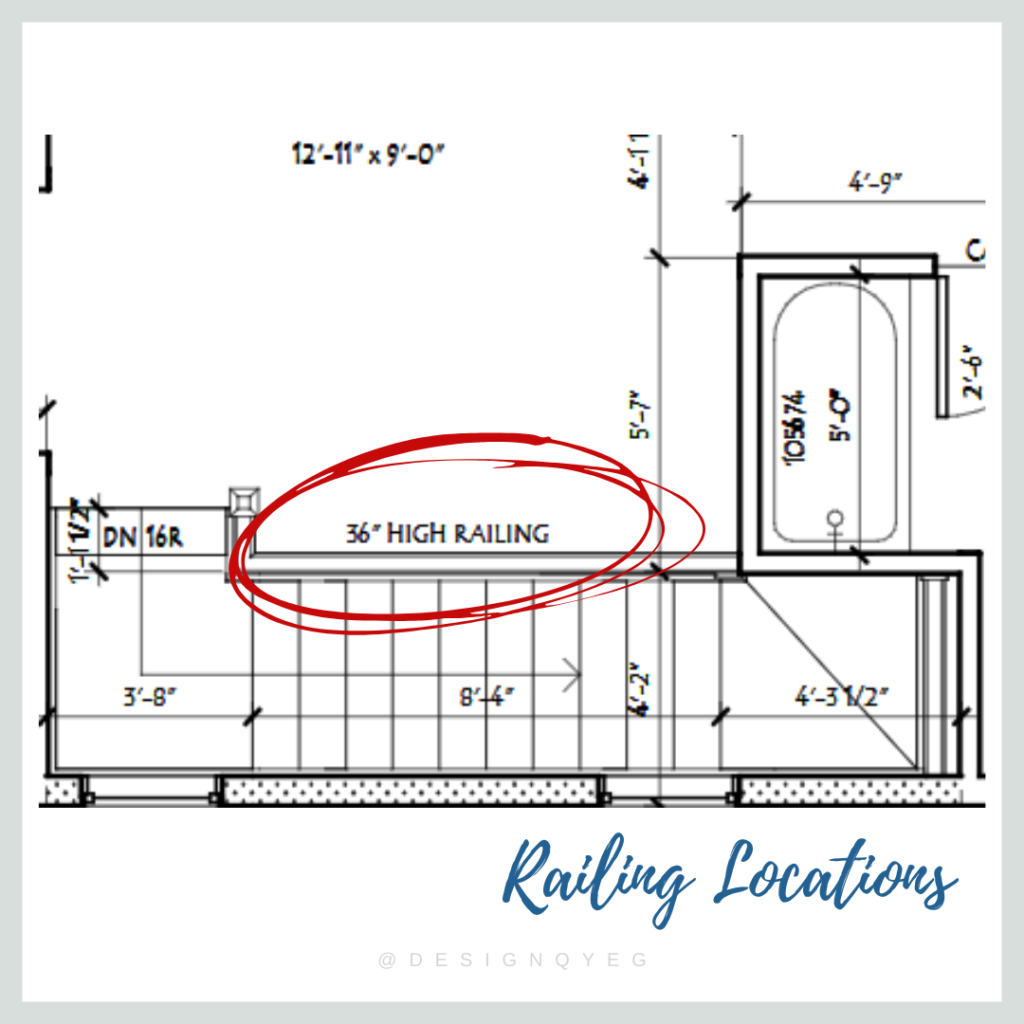
Another item most people want to look for is does the home include railing or a stubwall, and furthermore is it just on the main floor or upstairs too? 

First step is to find the staircase. Once you have located the staircase, look on the outside edge.

  • If it’s stubwall it will show diagonal lines and will read STUBWALL
  • If there is railing, it will generally show a smoother line space, and will say 36″ HIGH RAILING

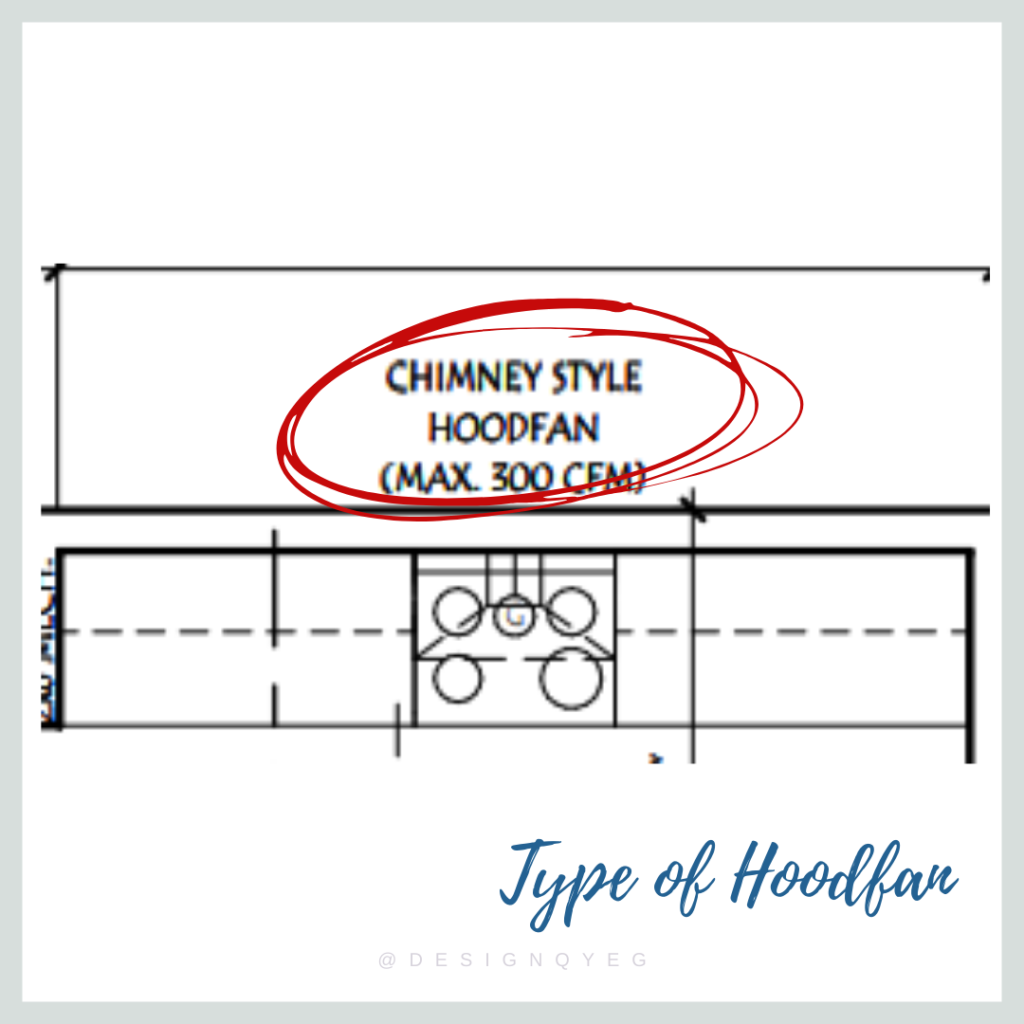
Type of Hoodfan

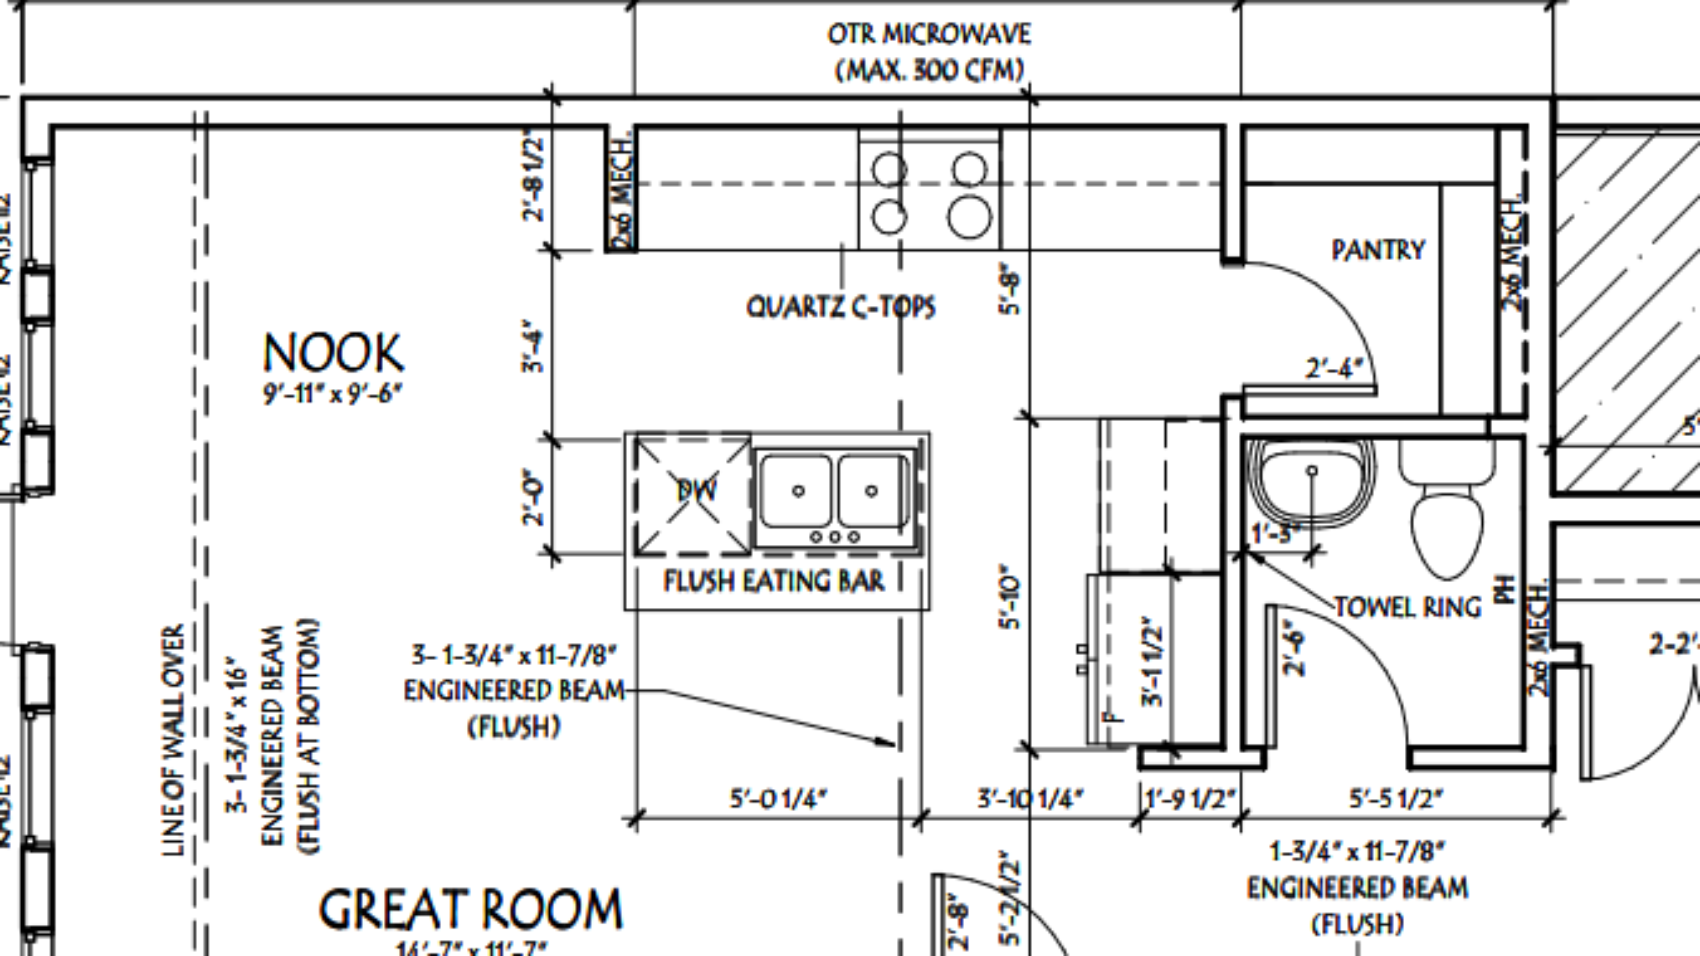
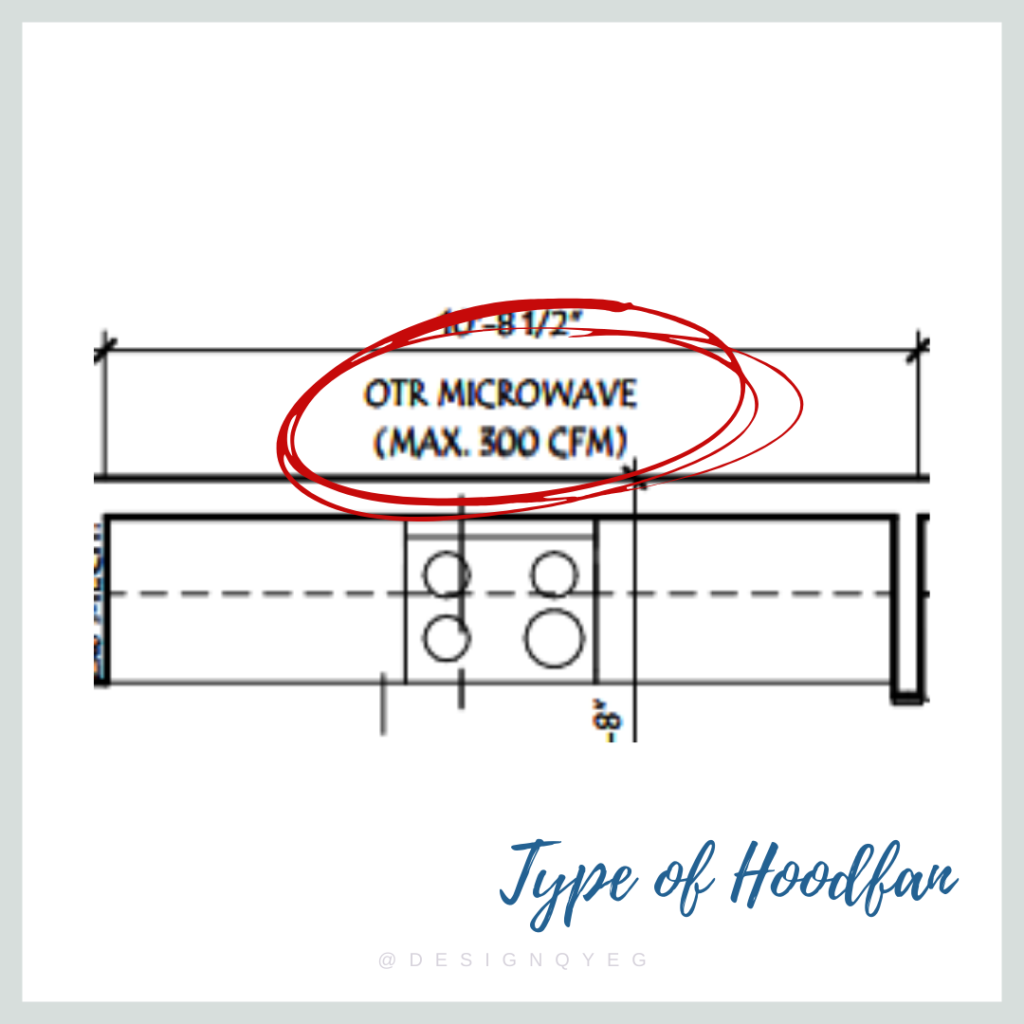
Another big question from clients is “what type of hoodfan do I get”. On the plans, search for the kitchen, and more specifically the stove. It will generally look like a square with 4 round circles on it. Typically, the hoodfan is above it. There will be a notation of what type of hoodfan is there. Types include:

  • OTR Microwave – This stands for ‘Over-the-range’ hoodfan + microwave combo
  • Hoodfan – This is just a hoodfan. The microwave will be located elsewhere in the kitchen. 
  • Chimney Style Hoodfan. This again will only be a hoodfan, no microwave. 

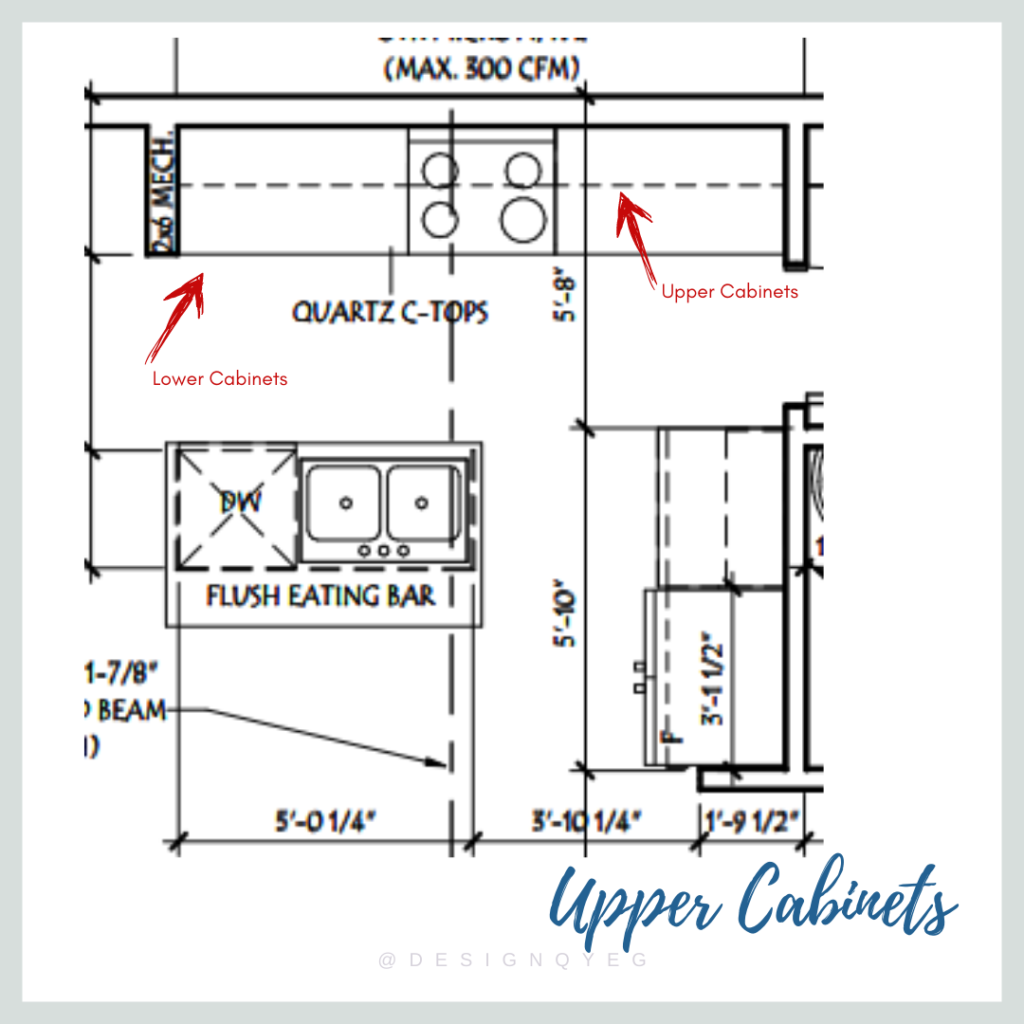
Upper Cabinet & Shelving Locations

A blueprint is generally showing a 3D building in a one dimensional version. Therefore, seeing an upper cabinet or shelving location can be a bit hard to locate. 

For a kitchen, the cabinet locations are drawn with just a simple solid line. You can usually tell they are cabinets because a) they are in the kitchen (or bathroom), and b) they show where the appliances will go. 

For an upper cabinet though, the line is shown as a dashed line, usually 3/4 of the way up from the solid lower cabinet line. 

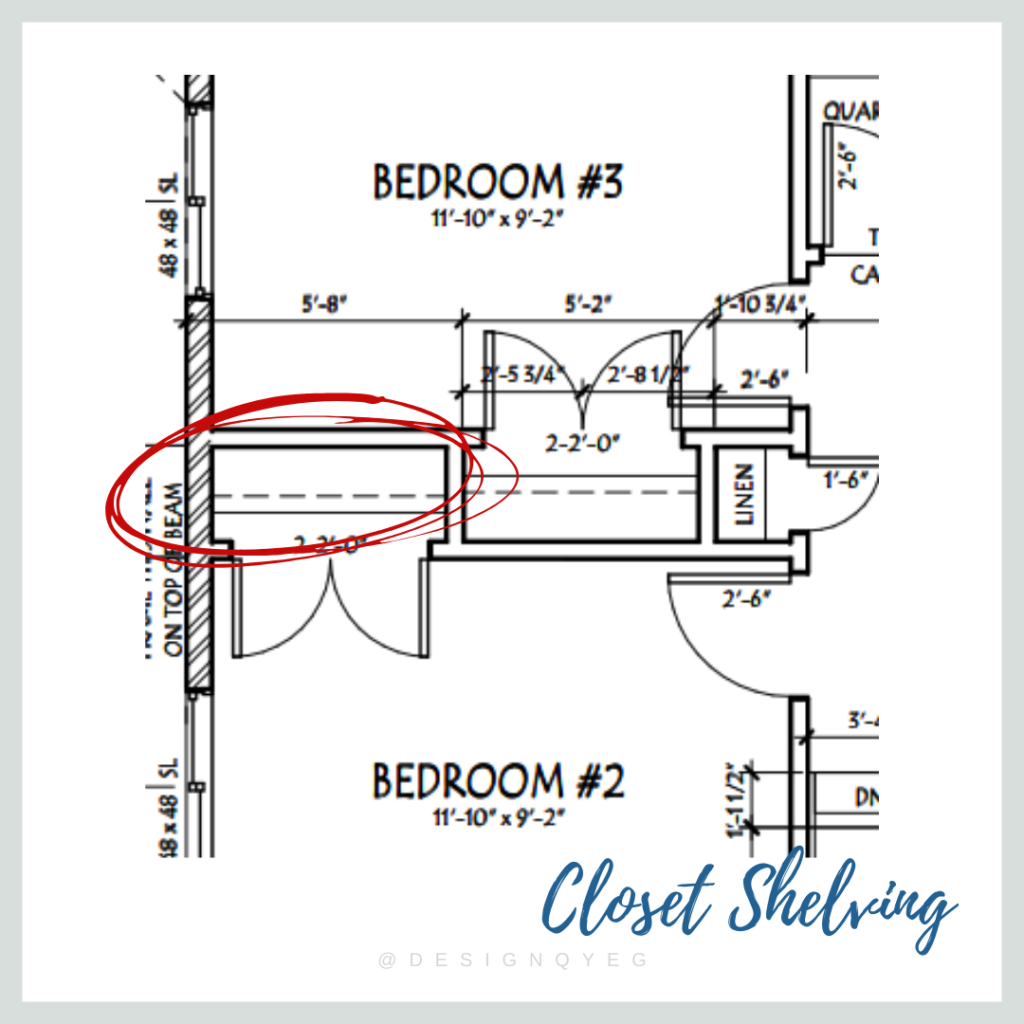
Some shelving lines will also be represented by a dashed line. For example, a shelf above a washer & dryer. Or in a closet too. 

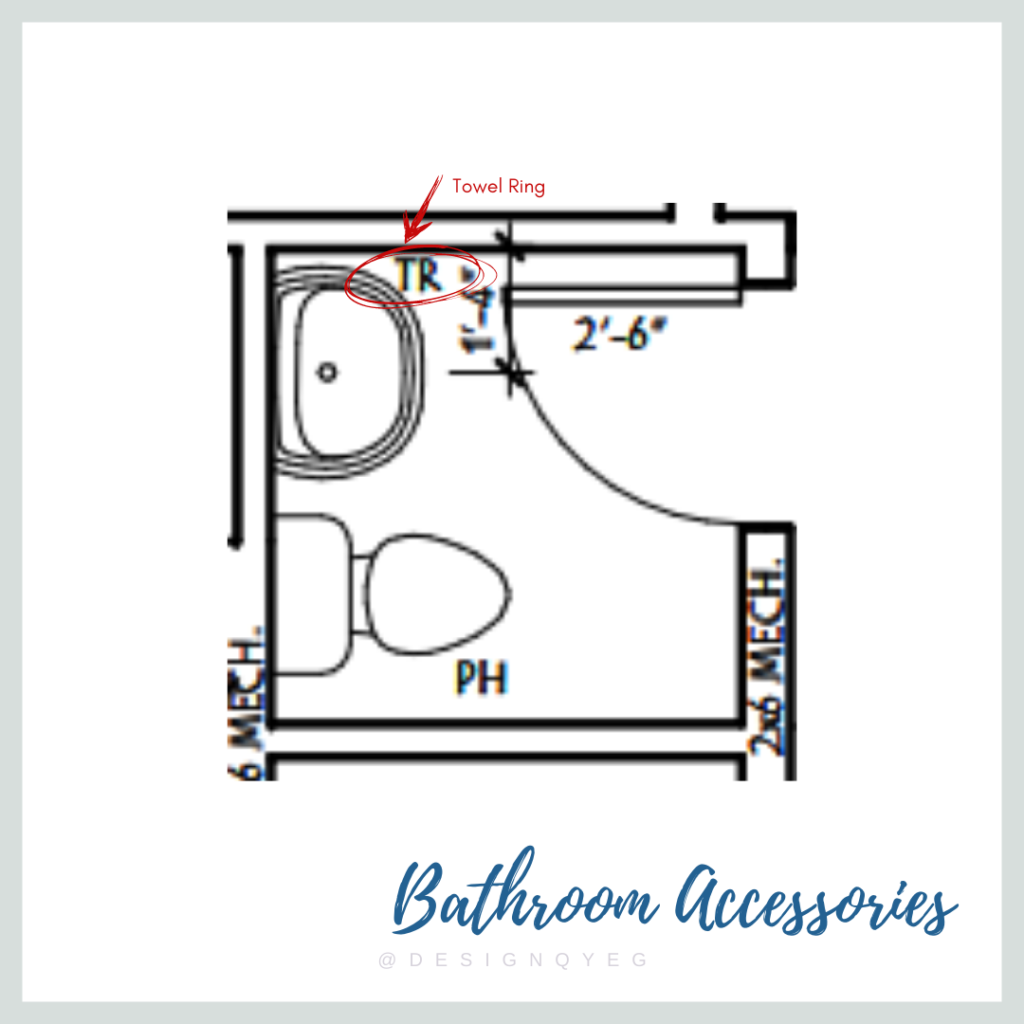
Bathroom Accessories

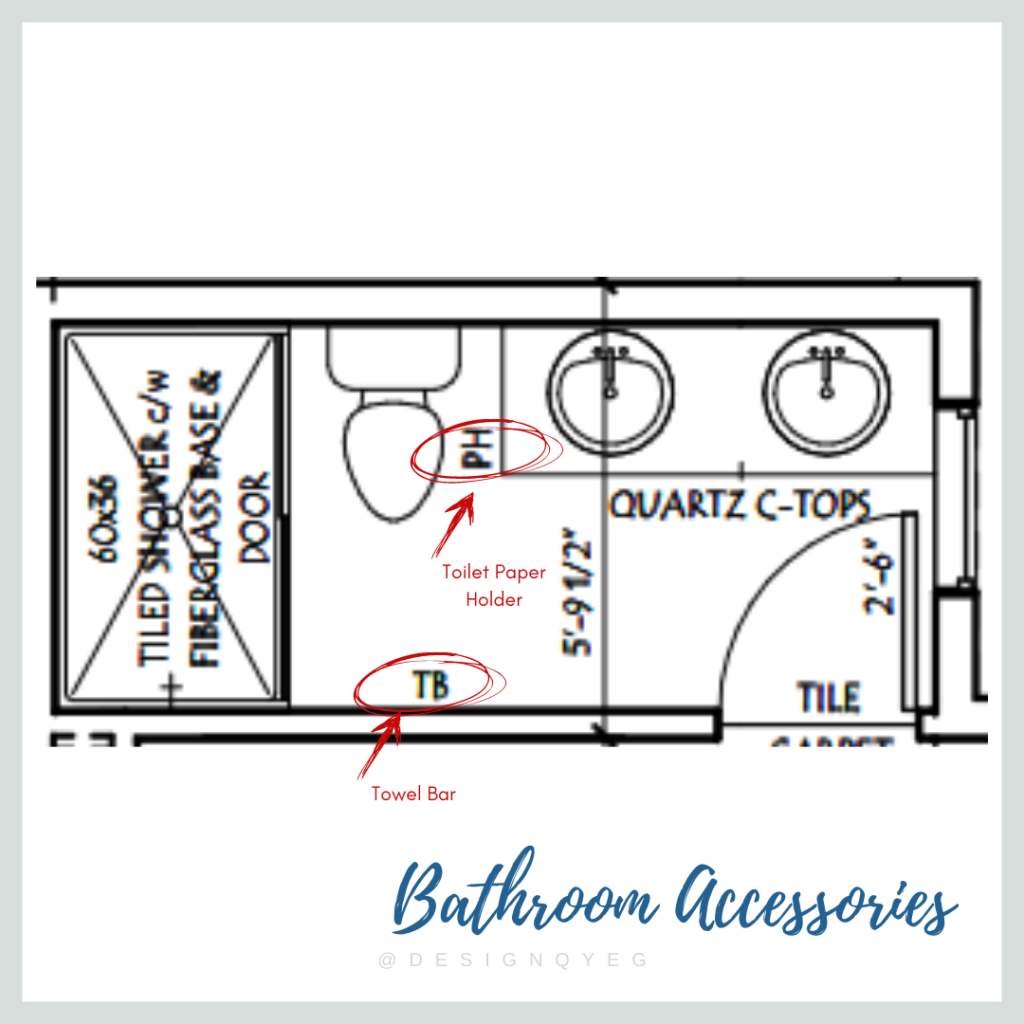
Towel bars, robe hooks and toilet paper holders may seem like small details, but trust me when you get out of your shower and have to run across the room to grab a towel, you’d wish you thought about the locations sooner! 

Most of the time, the builders standard locations for these items is in the right spot. However, if you customize your plan at all just double check these items are all in the correct spots, and there are enough of them! Here is how to spot them:

PH = (Toilet) Paper Holder
TB = Towel Bar
TR = Towel Ring
RH = Robe Hook

The above notations are simply a guide, and may not reflect each client’s individual blueprints or job plans. This is intended to provide a simple, easy reference for finding certain items, however all blueprints will be different. Please refer to your area sales manager or interior designer for accurate locations in your home.